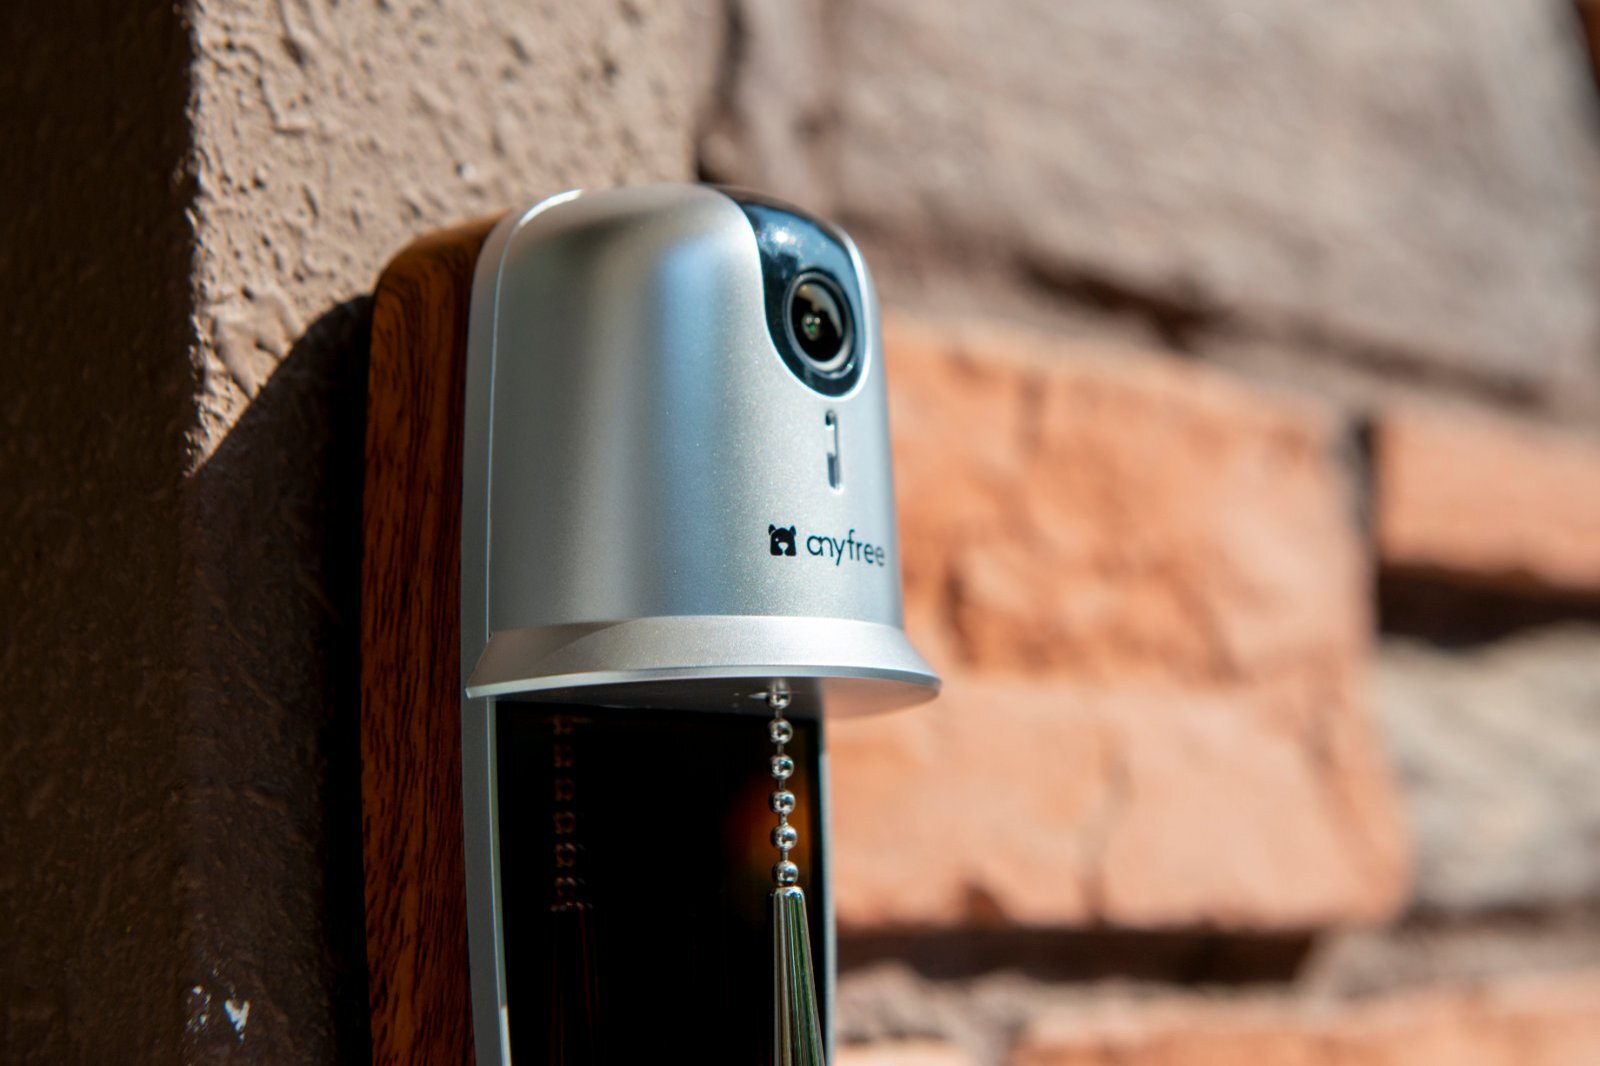
- What Makes the Hello Doorbell Different?
- Wireless Battery-Powered Design
- Solar Power Panel for Extended Battery Life
- Understanding Hello Doorbell Installation Requirements
- DIY Installation Methods for Hello Doorbell
- 1. 3M Adhesive Mounting
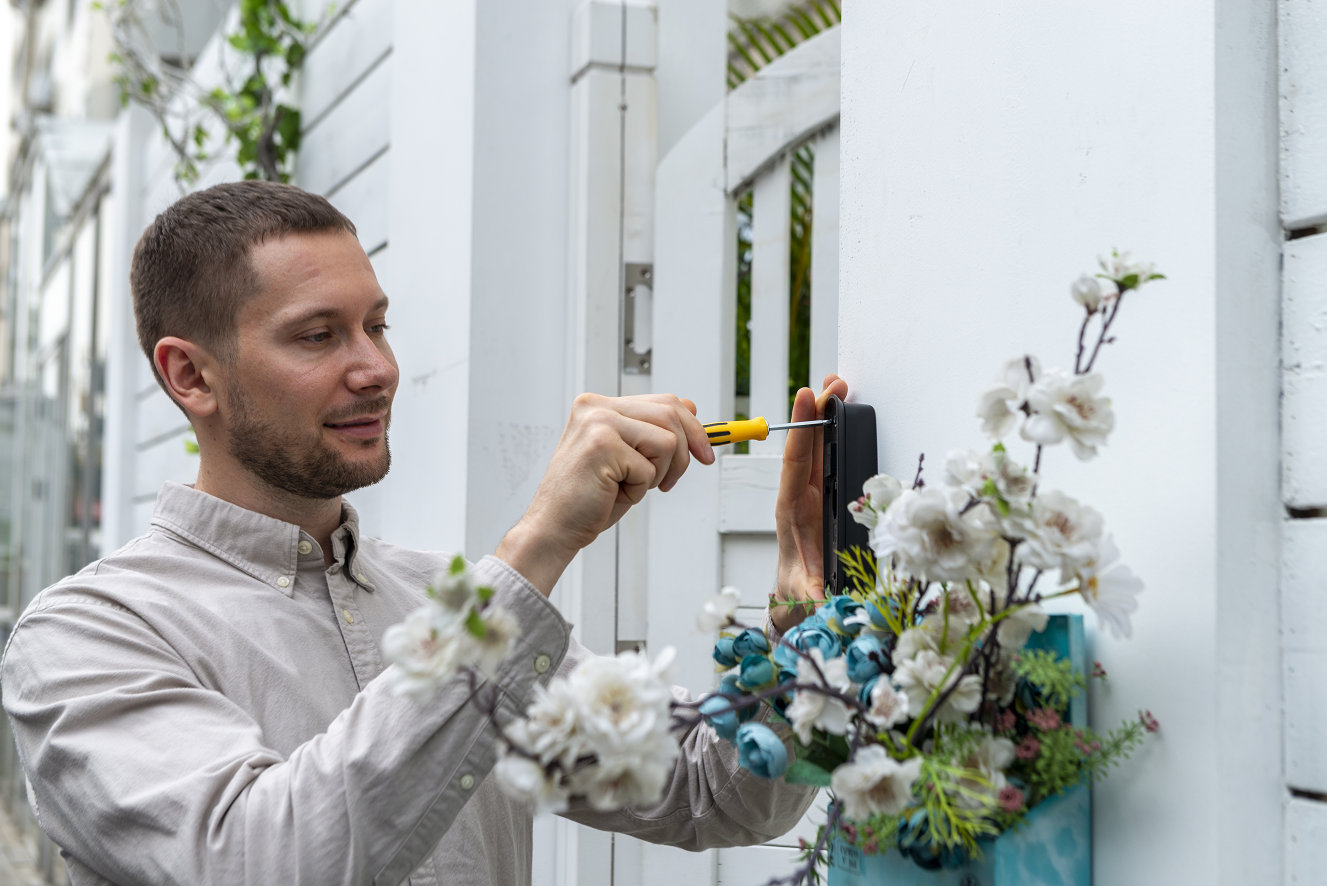
- 2. Screw and Drill Installation
- 3. Adjustable Angled Mounts
- Step-by-Step DIY Installation Guide
Smart doorbells are no longer a luxury, they’ve become a staple of modern home security. From package theft prevention to real-time video chats with visitors, these devices add both convenience and peace of mind. Among them, the Hello Doorbell stands out because of its wireless, battery-powered design with solar-assist charging.
And here’s the big question: Do you really need an electrician to install one?
The good news is that most homeowners don’t. Because it’s not hardwired, the Hello Doorbell avoids complex electrical work. That said, there are still certain circumstances where professional help might be the safer route.
This article will give you a clear breakdown of DIY installation to make the most out of your Hello Doorbell.
What Makes the Hello Doorbell Different?
Wireless Battery-Powered Design

Solar Power Panel for Extended Battery Life
The Hello Doorbell’s built-in solar panel is a battery extender, not a replacement for charging. It provides a steady trickle of power in sunlight, reducing how often you need to recharge but never eliminating the need entirely.
Like a hybrid car, solar assist stretches the time between charges, especially in sunny locations. However, heavy use features like motion detection, video recording, live streaming, and two-way audio drain the battery faster, particularly in high-traffic areas.
To avoid downtime, check your battery status regularly in the Hello app and recharge when needed. With solar assist and proper monitoring, your doorbell stays reliable and ready without frequent manual charging.

Understanding Hello Doorbell Installation Requirements
One of the main reasons people love the Hello Doorbell is its simple installation process. Unlike wired models, it doesn’t require a transformer, breaker switch, or complex electrical work.
Compatibility with Different Homes
Because it’s wireless and battery-powered, the Hello Doorbell works in almost any home setup, apartments, condos, older houses, or new builds. Renters can especially appreciate its non-permanent installation options, like adhesive mounting.
No Complex Wiring Needed
Traditional smart doorbells often require 16–24V wiring, which isn’t always compatible with older homes. With Hello, you avoid all that stress. Your only real consideration is choosing a good location that allows both Wi-Fi connectivity and sunlight exposure for the solar-assist charging.
That said, while the solar panel helps extend battery life, remember that proper battery charging is still necessary for full functionality. Think of the solar panel as a helper, not a replacement.
DIY Installation Methods for Hello Doorbell
1. 3M Adhesive Mounting

2. Screw and Drill Installation

3. Adjustable Angled Mounts

Step-by-Step DIY Installation Guide
Here’s a simplified guide to help you get your Hello Doorbell up and running in less than 30 minutes.
Tools You’ll Need
- Electronic drill (recommended if mounting on concrete or brick walls)
- Screwdriver
- Level
- Provided Toolbox
- Smartphone with Hello Doorbell app installed
- Access to strong Wi-Fi signal at your door
Safety Precautions
- Always mount on a stable, secure surface.
- Position the solar panel so it gets direct sunlight whenever possible.
- Avoid shaded or water-prone areas for installation.
- Test your doorbell’s connection indoors before physically mounting it.
Installation Steps
- Charge and power on. Fully charge your Hello Doorbell using the USB Type-C port, then switch it on.
- Connect before installation. Download the Hello Doorbell app, follow the in-app setup instructions, and make sure the doorbell connects successfully to Wi-Fi or the signal station.
- Choose your mounting location. Ideally near your main entrance, about 5 feet (1.5 meters) above the ground, with strong Wi-Fi and sunlight access.
- Install the mount. Use the adhesive strip for a quick setup, or the screws and anchors for a permanent, secure hold.
- Attach the doorbell. Align the doorbell with the bracket and snap it firmly into place.
- Secure it. If included, fasten the security screws at the bottom of the doorbell for extra protection.
- Customize settings. Use the Hello app to set up motion zones, notification preferences, and two-way audio.
- Test everything. Have a friend ring the bell or walk past the motion sensor to confirm video, audio, and alerts are working properly.
By confirming the connection before installation, you can avoid the hassle of taking the device down if Wi-Fi or app pairing issues occur. The process remains safe, simple, and beginner-friendly even if it’s your first time installing a smart home device.

Hinterlasse einen Kommentar
Diese Website ist durch hCaptcha geschützt und es gelten die allgemeinen Geschäftsbedingungen und Datenschutzbestimmungen von hCaptcha.